Mouse Ear Tag Applicator
The Guide For The Care And Use Of Laboratory Animals states that, “all who care for, use, or produce animals for research, testing, or teaching must assume responsibility for their well-being.” RapID Lab has taken that concept to heart and geared the design of their mouse ID applicator, and by extension, their whole process, towards the humane treatment of lab animals. It is imperative that researchers are able to procure their results without causing undue harm to animals. Other methods for tagging and identification do not allow this. They require cutting and puncturing far beyond what is necessary. Tagging lab animals can be a simple process, by following the RapID Tags® applicator instructions.
The stainless steel applicator has been designed to be easy to comprehend in both its construction and its use. The applicator consists of only a few parts. There are two tips at the end of the device, one male, one female. This ensures that the applicator is always loaded the right way. Users must operate the ejector with the thumb of their dominant hand, while using the other hand to gently secure the lab animals. The grooves on the bottom of the device allow it to fit comfortably in the hand, and let users maintain a firm grip while they use it to apply tags to their animals.
4 Step Loading Process
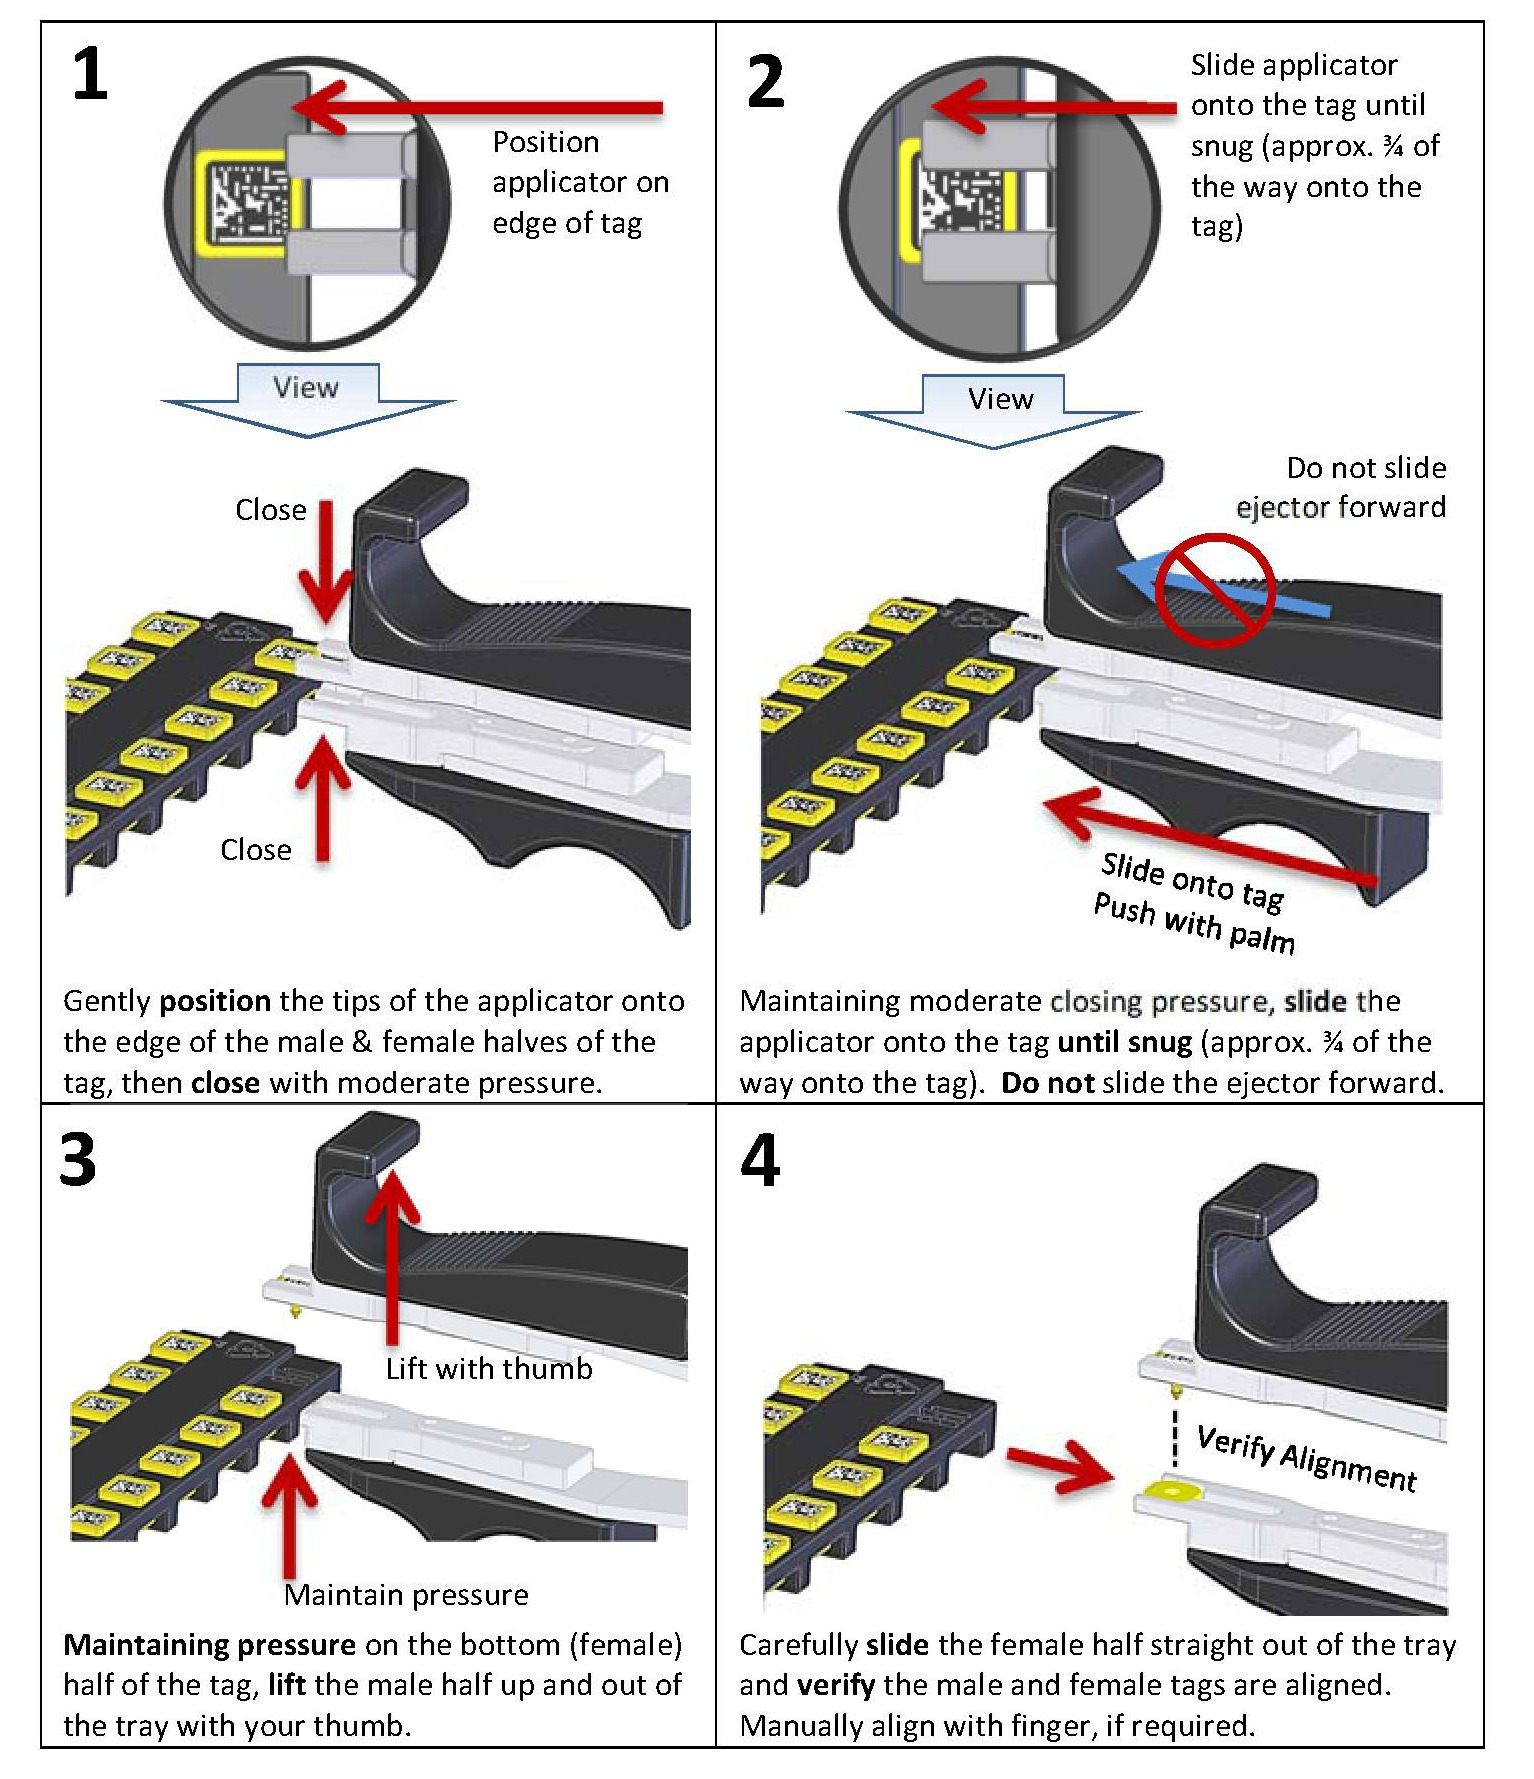
Users should grasp the applicator in their dominant hand, and secure the tag tray with their non-dominant hand (loading position shown in the diagram below) . Then, one must follow these steps to load the applicator:
- Step 1. Position, then gently close the tips of the applicator onto the edge of the tag. Verify that the male and female halves are correctly aligned, then close with moderate pressure.
- Step 2. Pushing with the palm and ring finger, slide the applicator onto the tag until snug (ensuring the tag is completely engaged). One should make sure that they don’t slide the ejector forward accidentally. They should also maintain a moderate closing pressure throughout this procedure.
- Step 3. Using their thumb, users must lift the male half of the tag up and out of the tray. They should maintain that pressure on the female half of the tag.
- Step 4. Lastly, they should carefully slide the female half straight out of the tray, verifying that the male and female ends are aligned properly. If necessary, users should manually align them with their fingers.
4 Step Application Process
 Now users are ready to start tagging. They should follow these 4 simple steps to ensure that they humanely secure the tags to their lab animal’s ear:
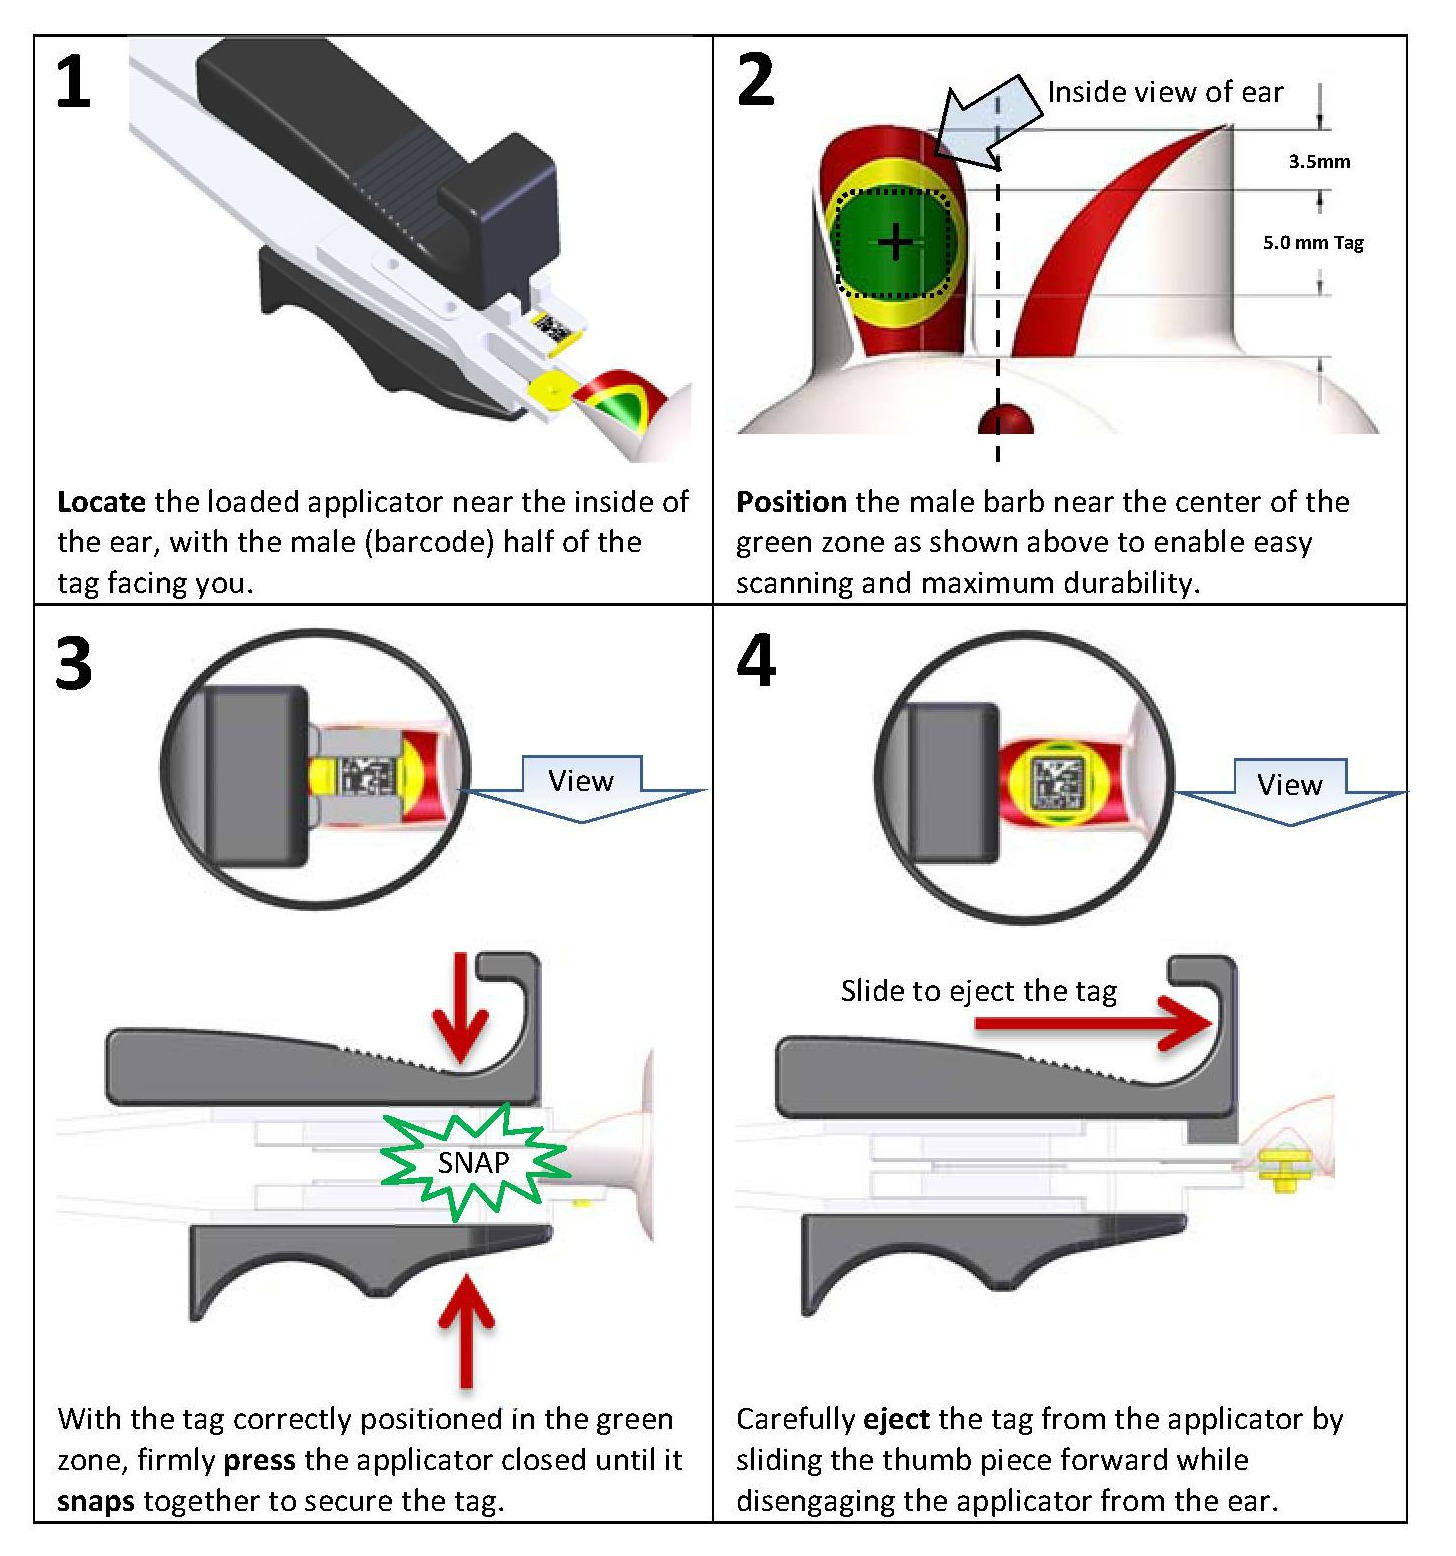
- Step 1. Ensure that the applicator is loaded correctly. The male and female ends should be aligned. Restrain lab animal using the non-dominant hand. Hold the loaded applicator with the thumb slide facing user near the ear.
- Step 2. Position the male applicator tip onto the ear so that it is in the target zone (shown in diagram).
- Step 3. When certain the tag is correctly positioned, firmly press the applicator closed by squeezing thumb and index finger together. Users will hear and feel the tag snap together. They should ensure that they change their grip from the tag loading position to the applying position (shown in the diagram above).
- Step 4. With the applicator closed, slide thumb forward to eject the tag.
That concludes successful application of the tag. The process can be repeated as needed, but is quick enough to allow users carry on with their work with little hassle.
Still have questions? Contact the support team here.